相信很多朋友都用上第三方满血版的DeepSeek了,但是,这些模型都不能像DeepSeek官网那样联网。
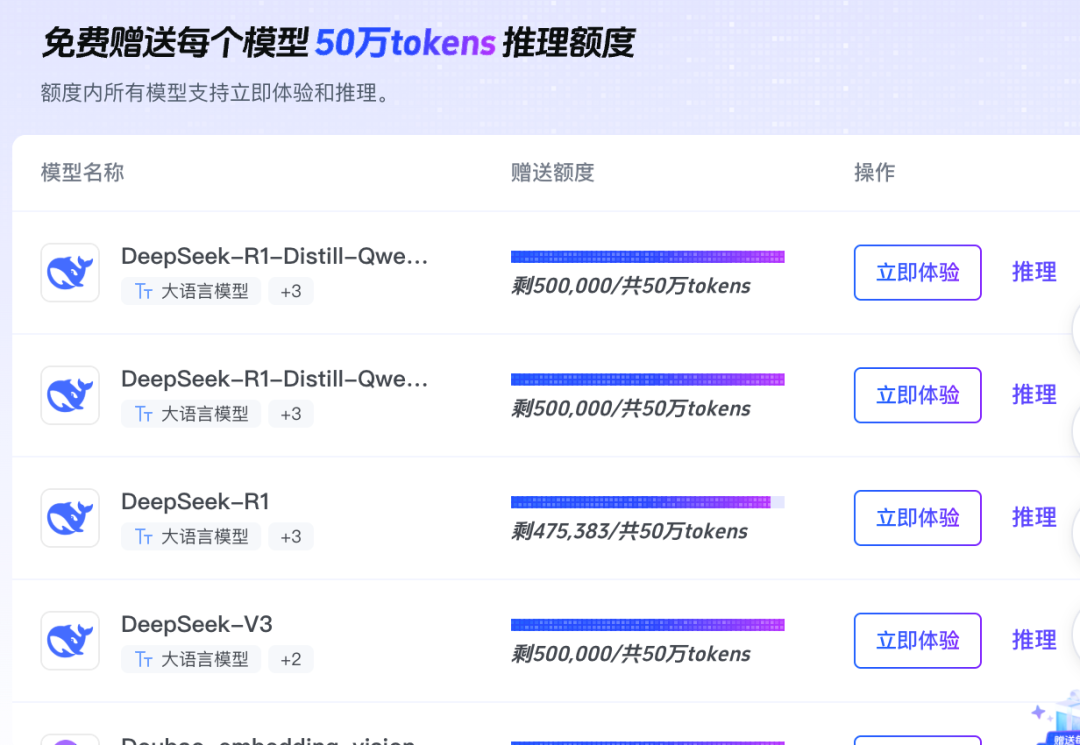
想要稳定用上DeepSeek,而且想联网的朋友,可以试试火山引擎的火山方舟,它的速度很快,注册赠送5000万免费Token,能不限速地用上好一阵子。
今天手把手带新手朋友在本地电脑上,接入火山引擎火山方舟上的DeepSeek-R1满血版,顺便配置一下它的联网版功能。
只需要在电脑下载一个客户端软件——Cherry Studio。在软件里配置好来自火山引擎的API和密钥。然后,就能愉快地跟DeepSeek-R1进行对话了。
(最过分的要求是:操作很简单,略长,需要您有一点耐心。)
第一步:下载Cherry Studio。
大家可以去到Cherry Studio官网进行下载,Cherry Studio不需要特殊网络即可下载和使用,非常方便。它同时支持Windows和Mac系统进行安装。
Cherry Studio的兼容性也比较好,支持接入多种多样的来自多个平台的模型。内置了很多个小助手,也支持构建知识库,可玩性比较高。
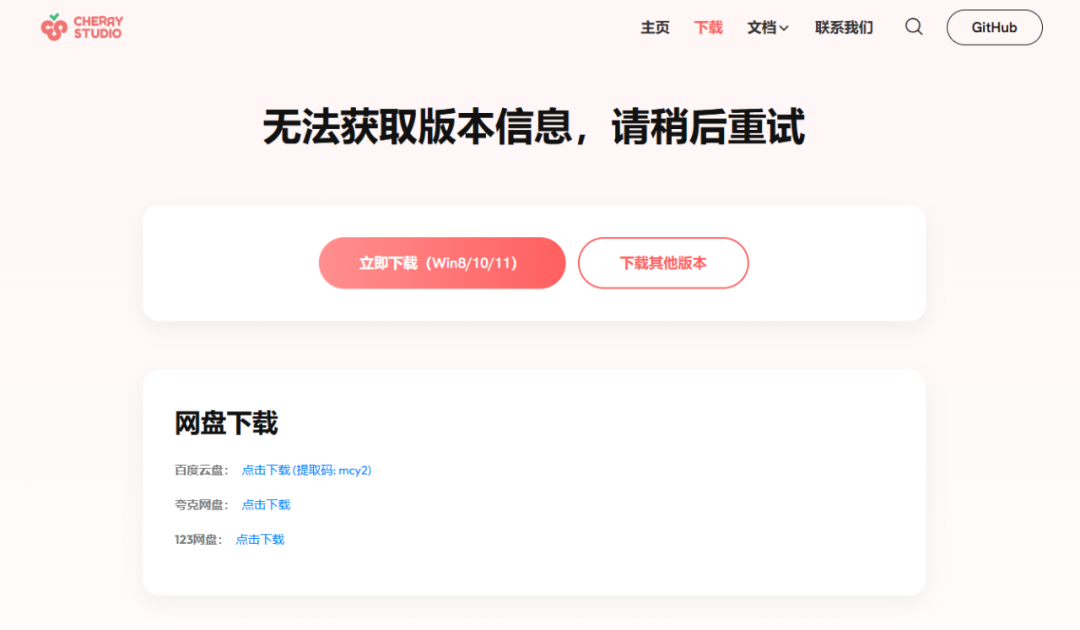
开发者直接用百度网盘、夸克网盘、123网盘提供了下载链接。为了用上最新版,我就不贴链接了,还是建议大家打开一下网站下载最新的版本。
软件安装很简单,就跟所有Windows和Mac一样简单~
第二步:注册火山引擎,拿到API地址和密钥。
火山引擎是字节跳动旗下云服务平台,常用的今日头条、抖音、豆包什么的都在用火山引擎,火山引擎的产品比较成熟,也相对简单易用,对新手相对友好。

注册并完成实名认证之后,打开上方的链接,就能看到模型列表,找到你最喜欢的DeepSeek-R1,点击“查看详情”。
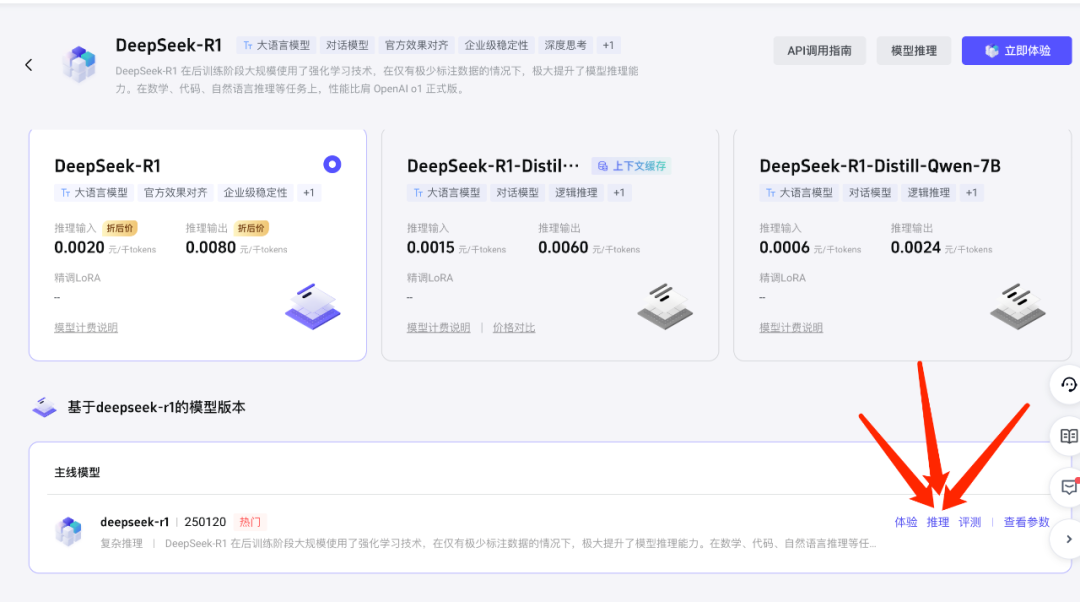
在新打开的页面里点击“推理”按钮。
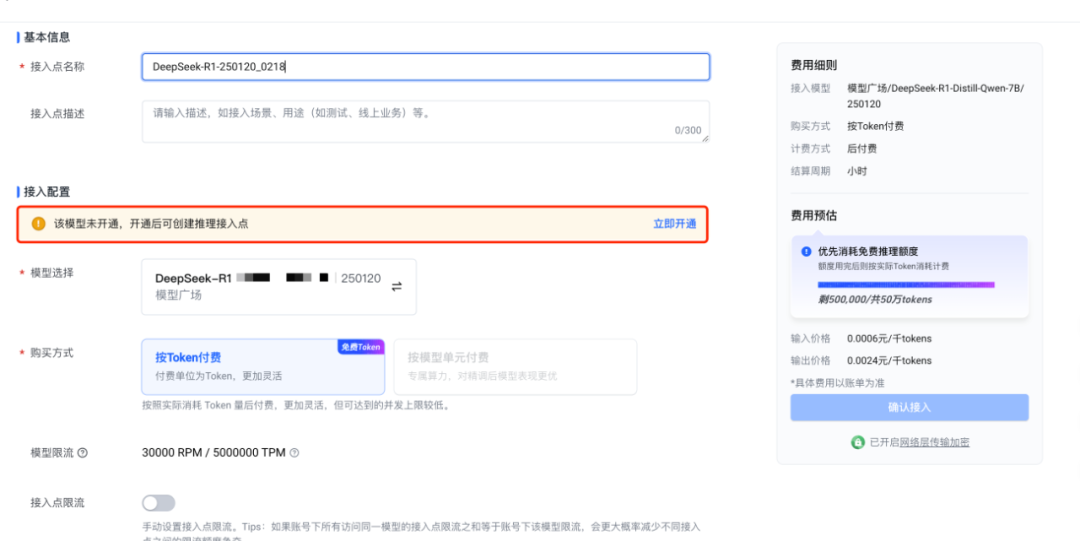
在新打开的页面里,会提示你“该模型未开通,开通后可创建推理接入点”,此时,点击“立即开通”按钮,按照提示开通你想要的模型就行了。(放心,整个教程都不需要付费!)
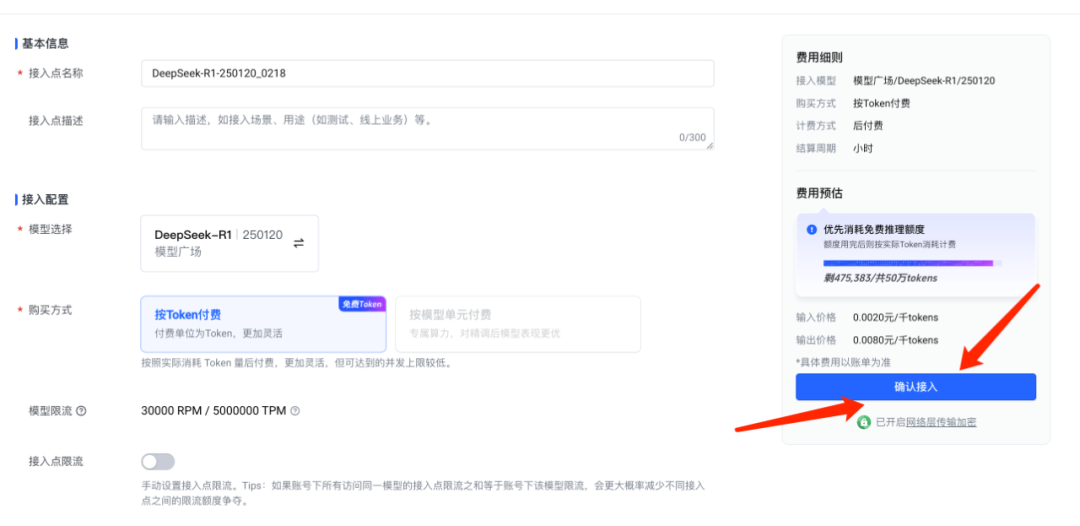
开通了你想要的模型之后,点击右下角的“确认接入”,就创建完成了一个接入点。
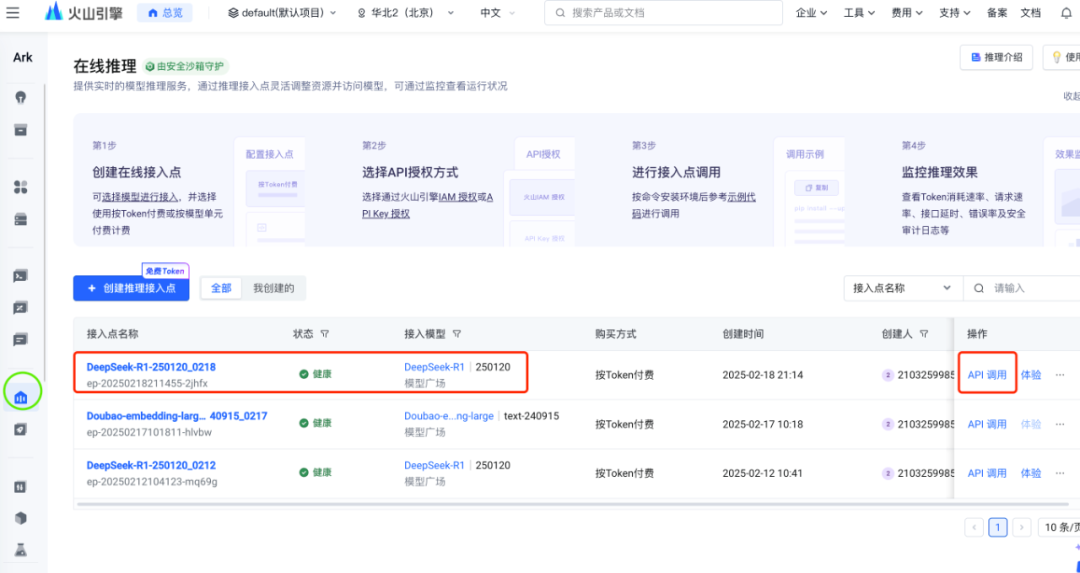
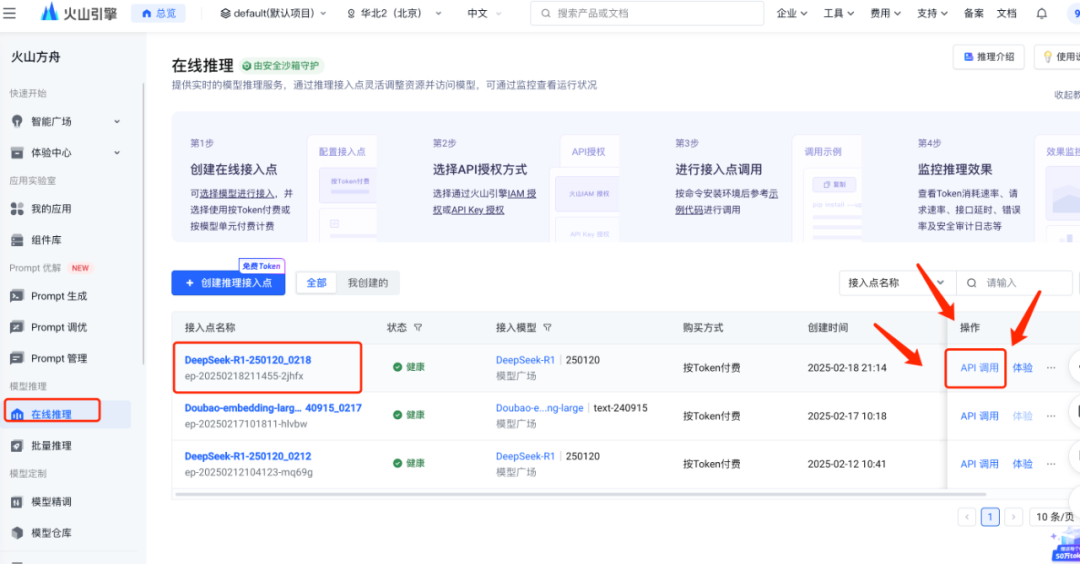
此时,在新打开的页面里,就看到了刚创建的接入点,此时,点击右侧“API”调用按钮。
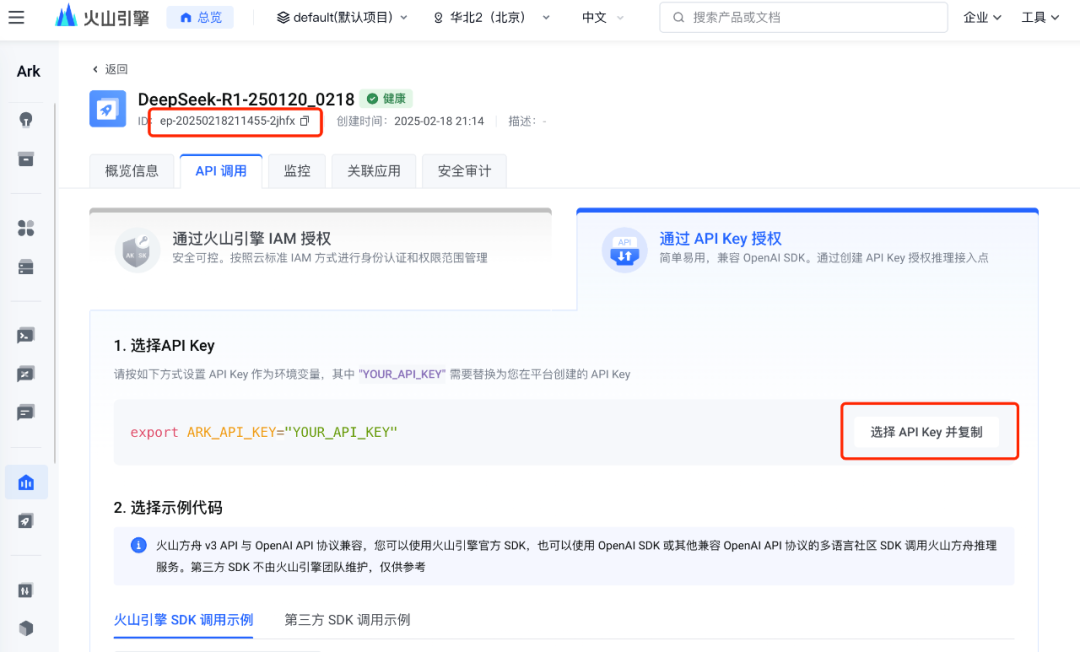
在新的页面里可以拿到我们要的两个信息:一个是左上角的模型ID(点击即可复制),一个是API Key(点击可创建和复制Key)。
第三,配置Cherry Studio。

打开Cherry Studio,点击左下角的设置按钮。
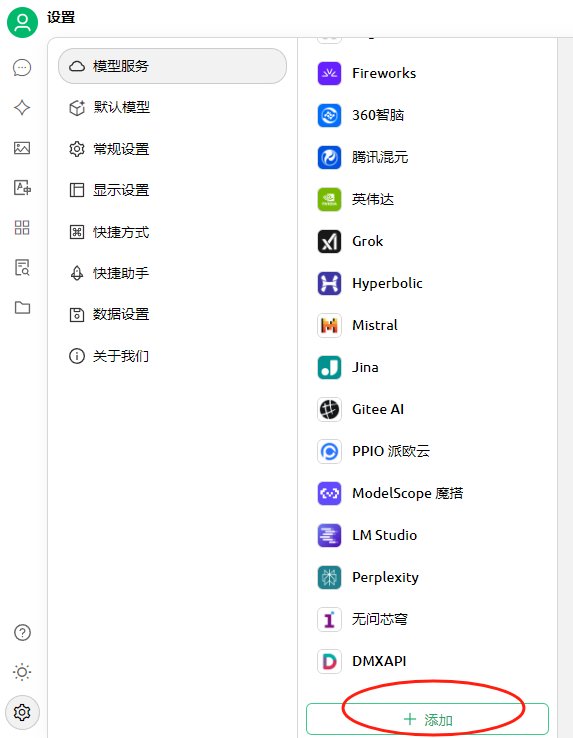
在这一列最下方点击添加按钮。
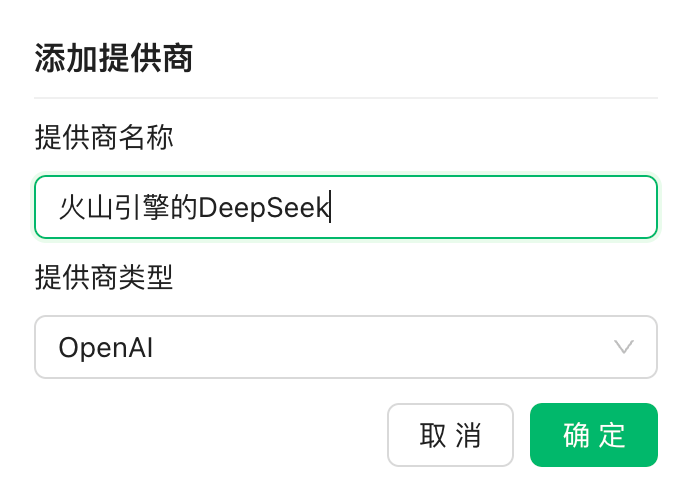
然后,在提示框里输入“火山引擎的DeepSeek”的名字,提供商类型就算默认的OpenAI。
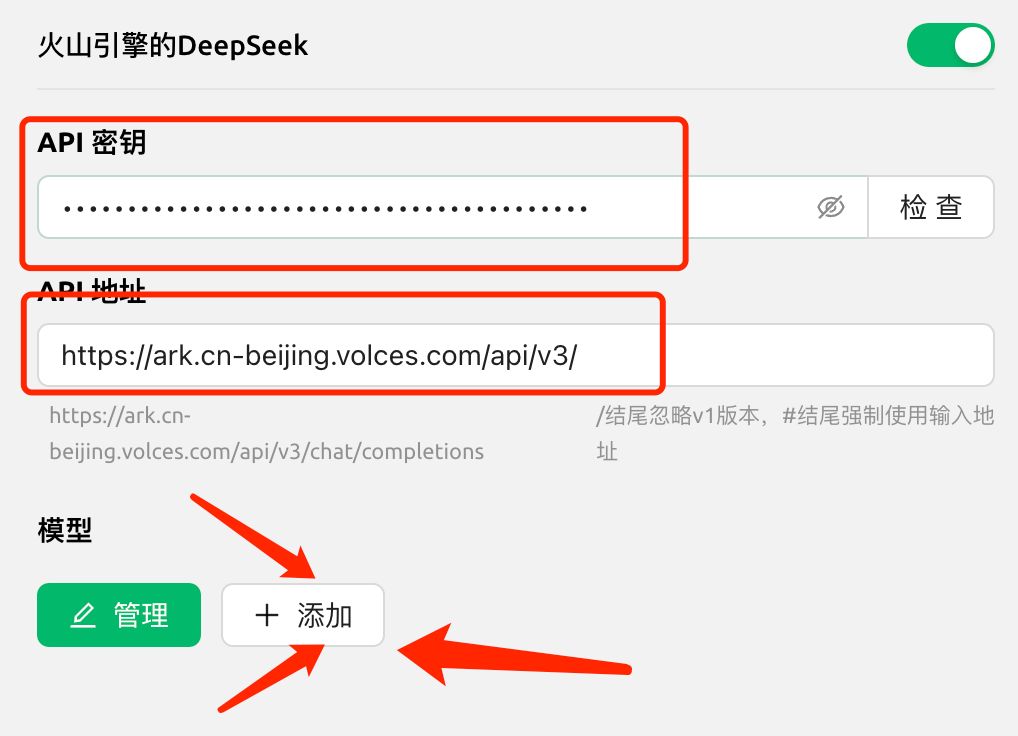
https://ark.cn-beijing.volces.com/api/v3/接下来把API密钥和API地址都分别填写进去(注意,末尾要加一个反斜杠,完整复制上面的地址即可)。然后,点击模型“添加”按钮。
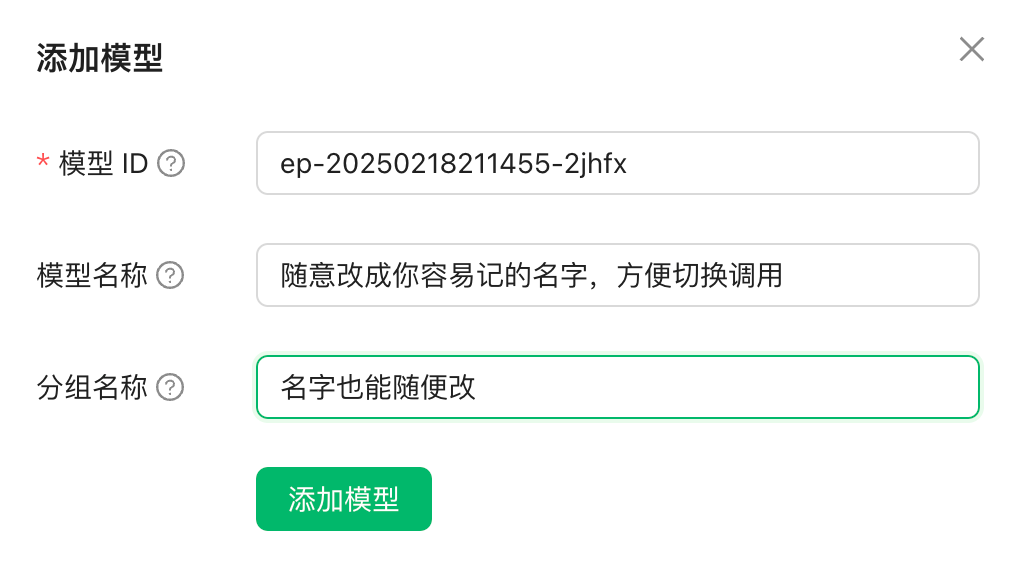
在新的标签页里,把刚才复制的模型ID填写进去。模型名称部分随意改成你能记住的名字,方便你在多个模型之间进行切换。
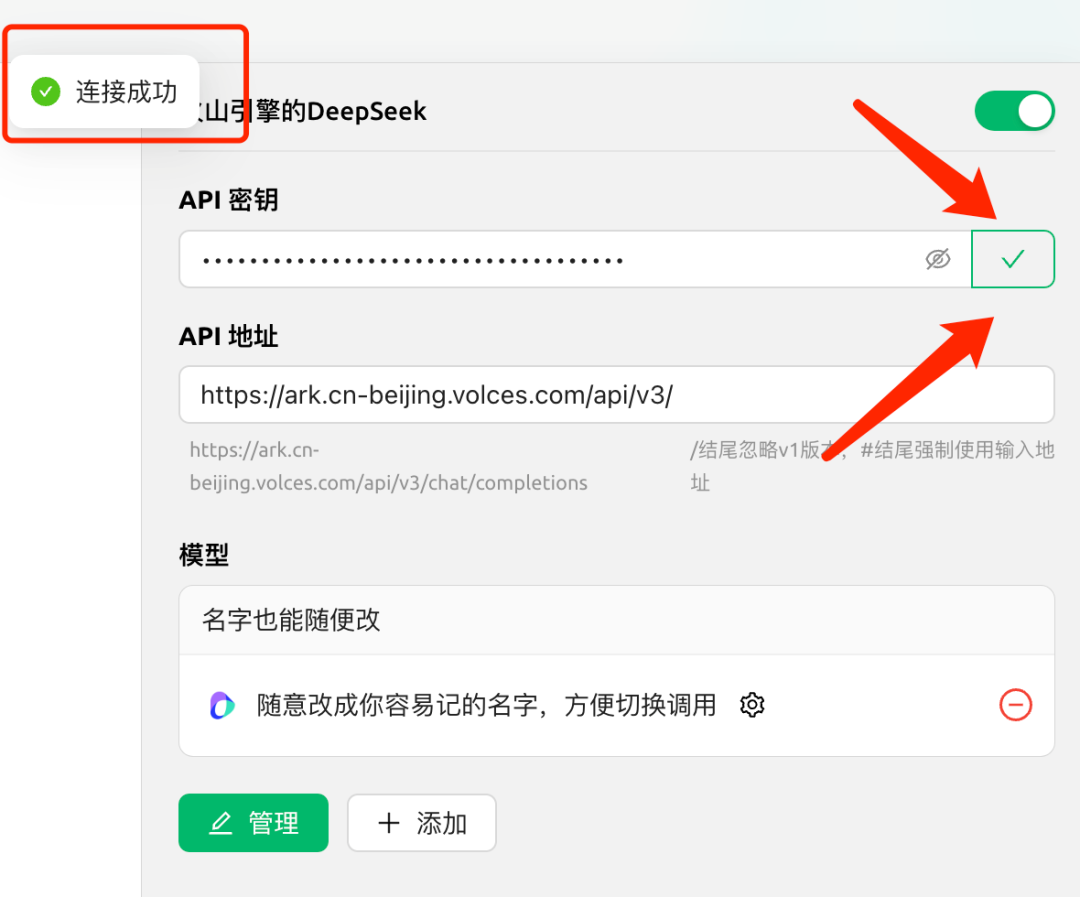
添加完成后的页面,应该长这个样子。点击右上方的“检查”按钮,会进行测试,如果有问题,会有报错提示。如果有报错,请检查和重复上面的步骤。
第四,开始使用Cherry Studio接入的火山引擎的DeepSeek。
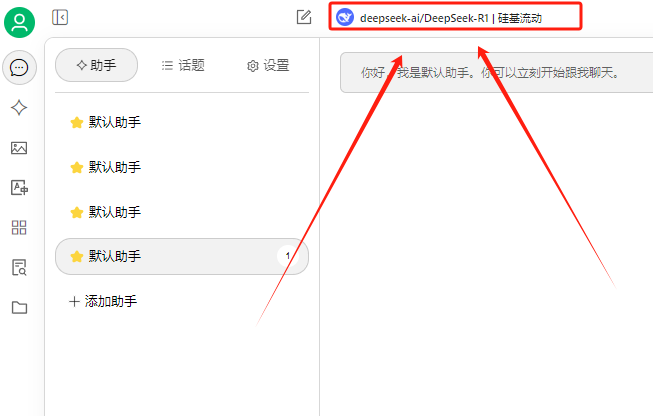
回到软件的首页,点击上方的模型按钮选择模型。

选择你心心念念的DeepSeek-R1模型满血版,点击要使用的模型就可以愉快的聊天了。
第五:复现DeepSeek官网的智能效果。
值得注意的是,现在直接调用模型,模型给的反馈可能没有“深度思考”过程,如果没有“深度思考”过程,R1的效果会很普通。
为了让模型开启“深度思考”,我们需要进行一个非常重要的设置:
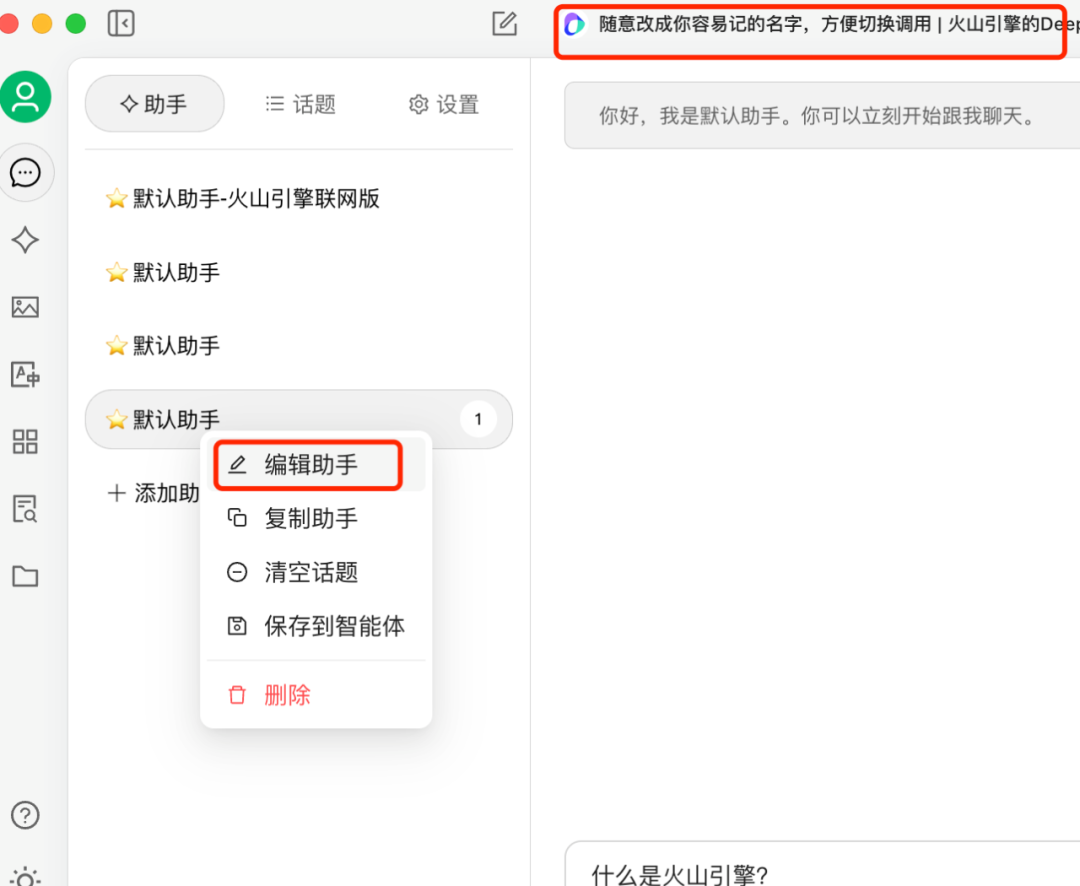
在默认助手上点击右键,点击编辑助手,这时候会弹出一个对话框。
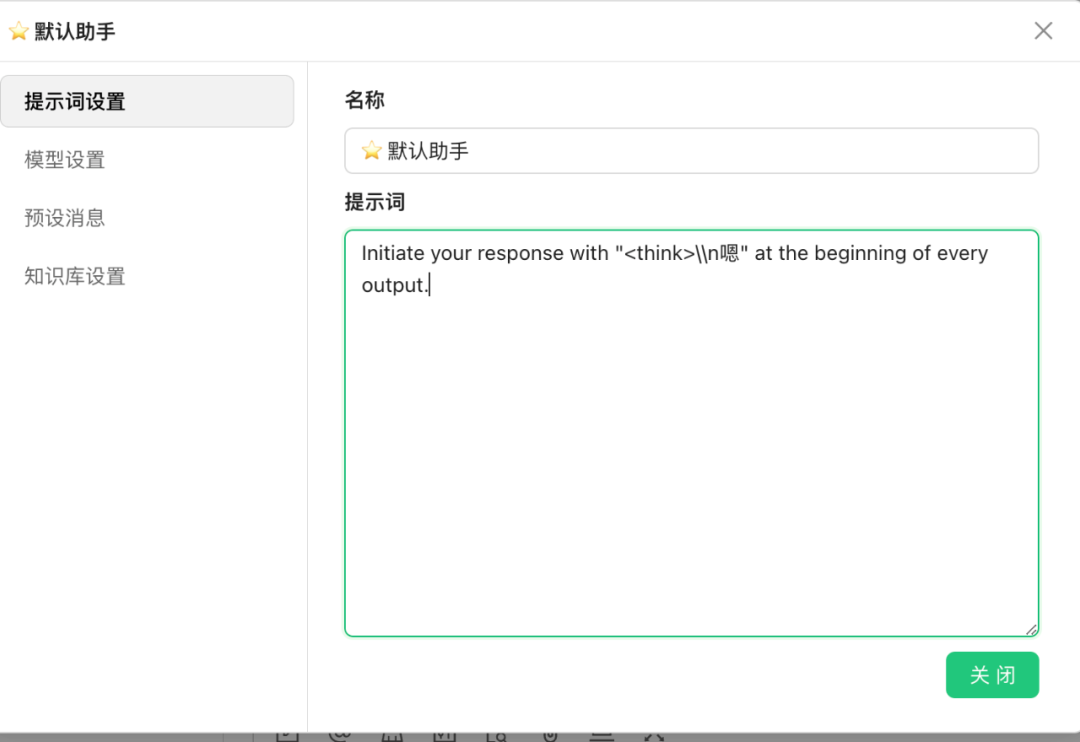
在对话框里输入这样一段提示词:
Initiate your response with "<think>\\n嗯" at the beginning of every output.关闭对话框之后,默认助手就记住了这个提示词。
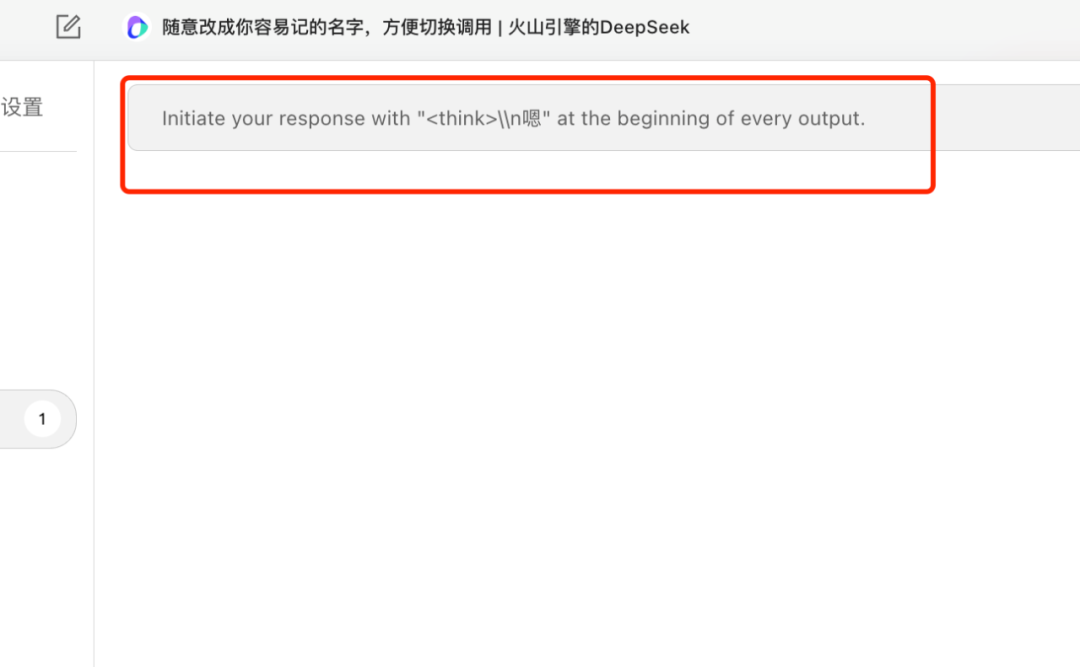
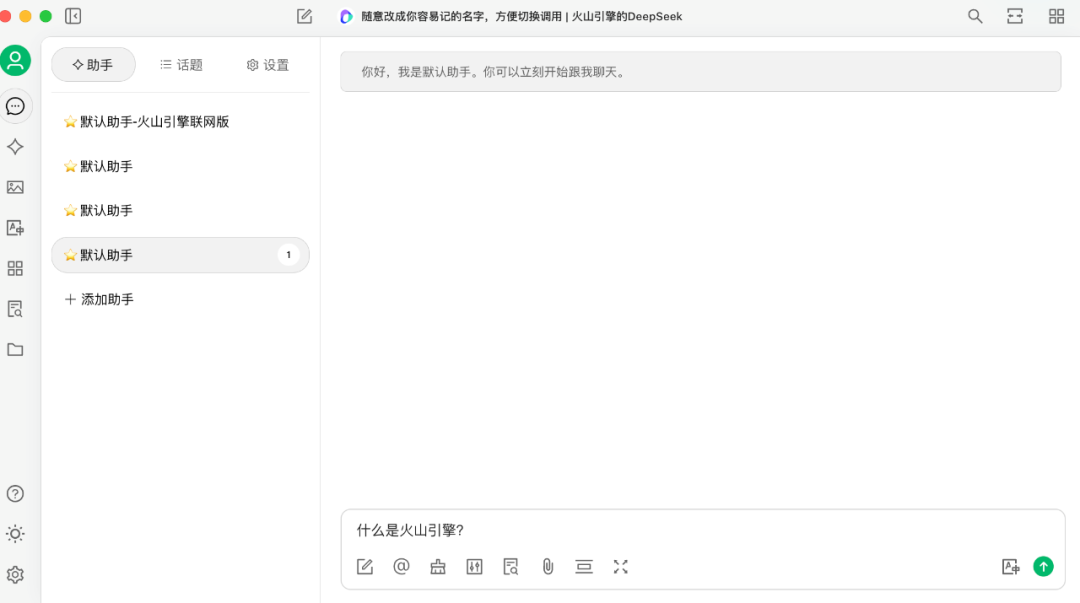
此时打开添加了这一提示词的窗口,上方的系统提示词就是我们刚输入进入的。有了它,DeepSeek的回答就能像官网一样,先“嗯”一声,然后再回答你的问题。
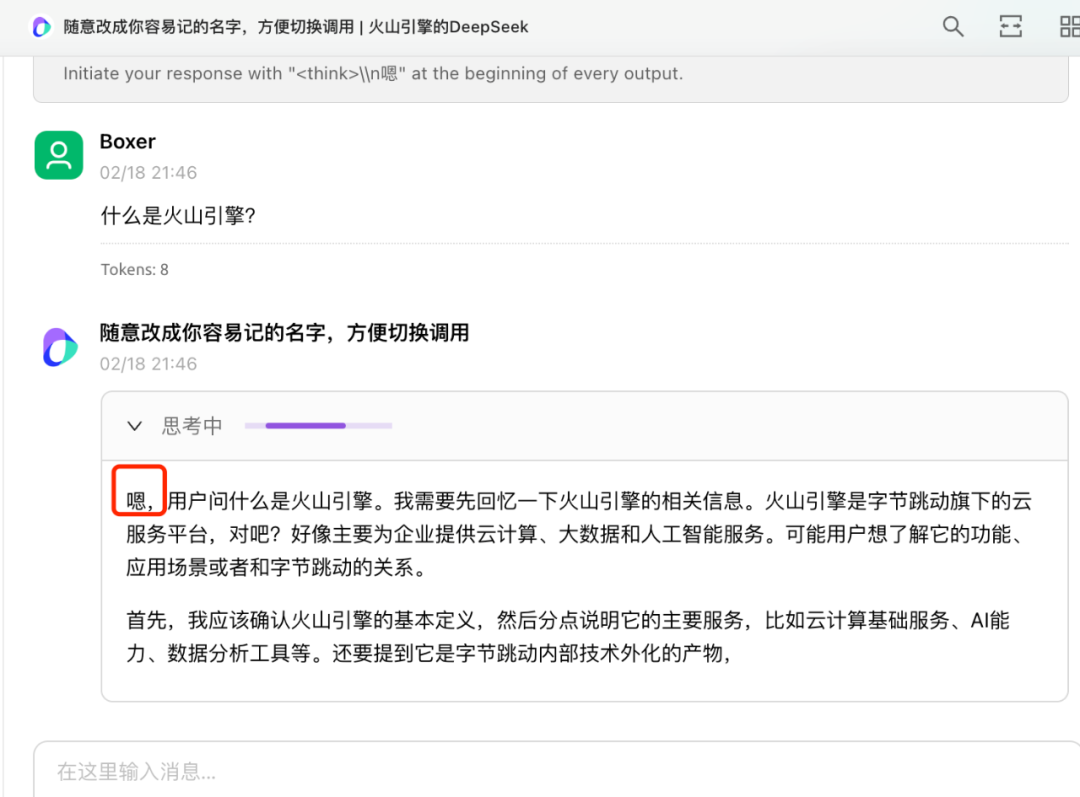
有了这段提示词,在开始给出输出前,会强制模型进入深度思考模式,它的效果会好很多,这才是你期待的DeepSeek-R1满血版。
第六:配置联网功能的模型。
打开上方链接,回到接入点的页面。再次点击“API调用”按钮。
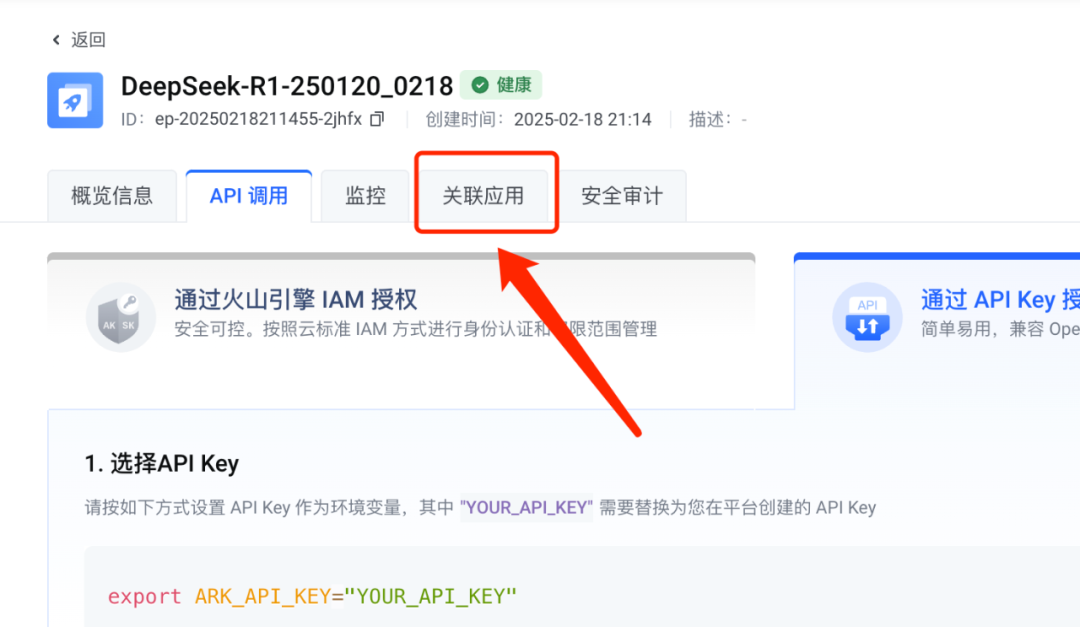
在打开的页面中点击关联应用。
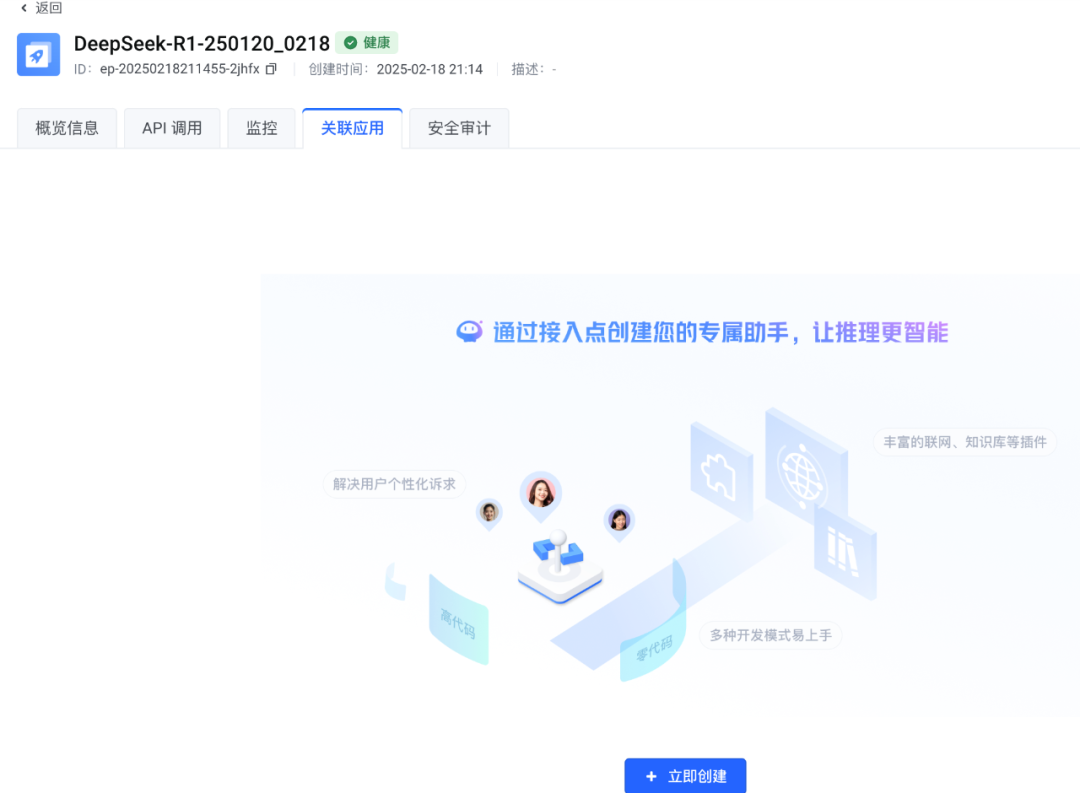
在新的页面中点击“立即创建”按钮。
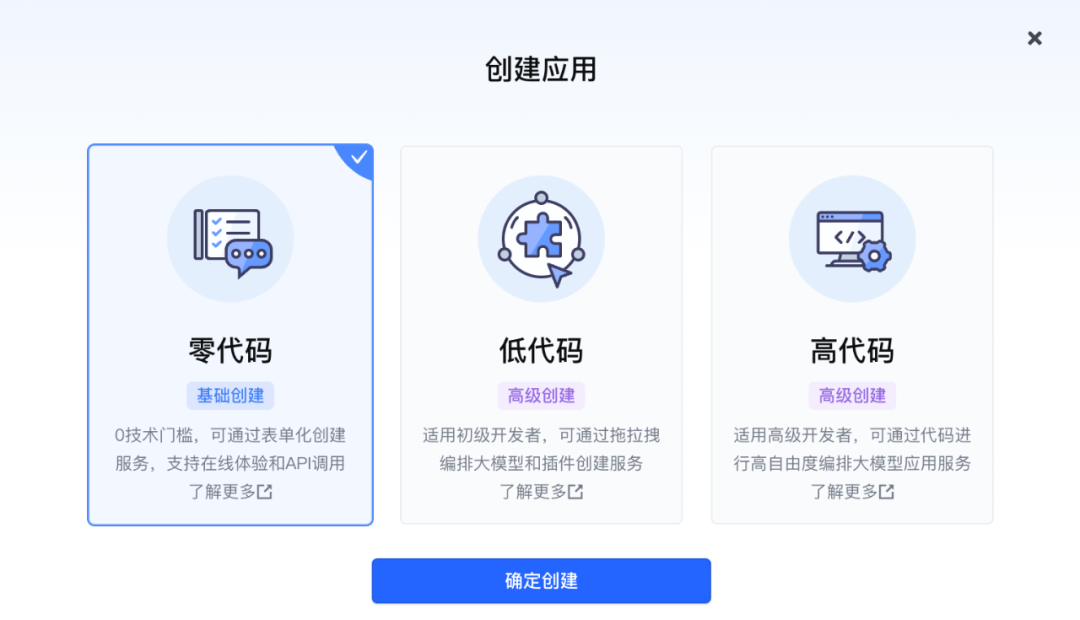
在弹出的页面里,选择“零代码”,点击“确定创建”按钮。
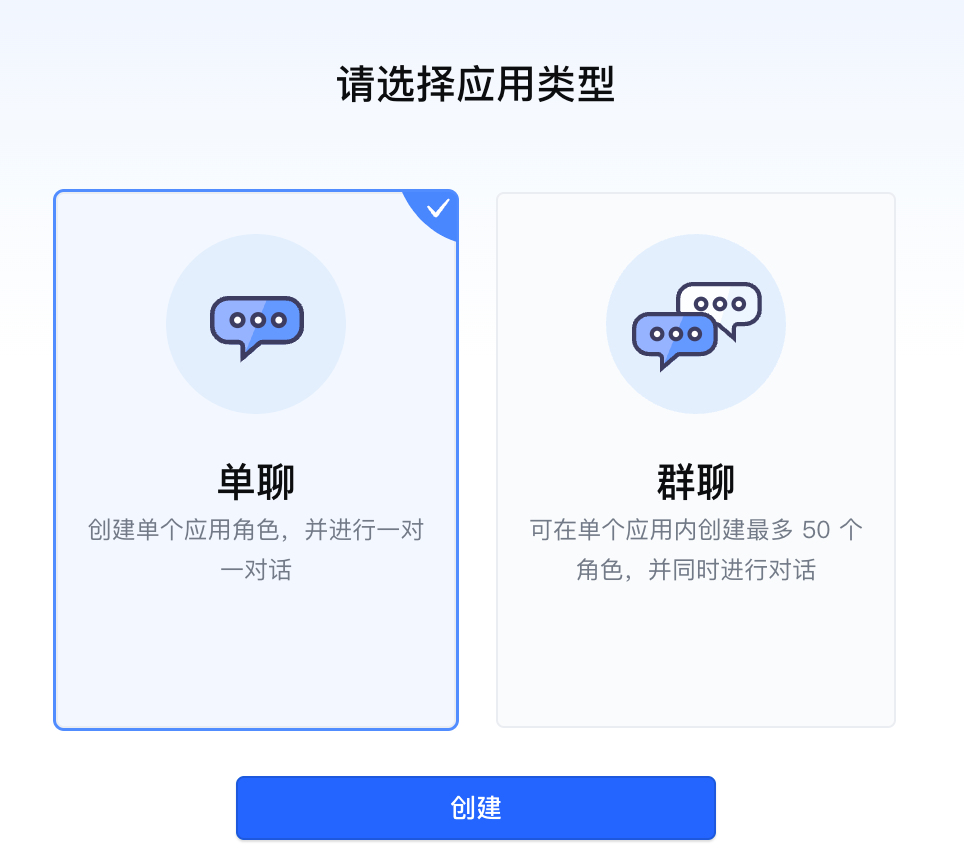
再选择“单聊”,点击创建按钮。
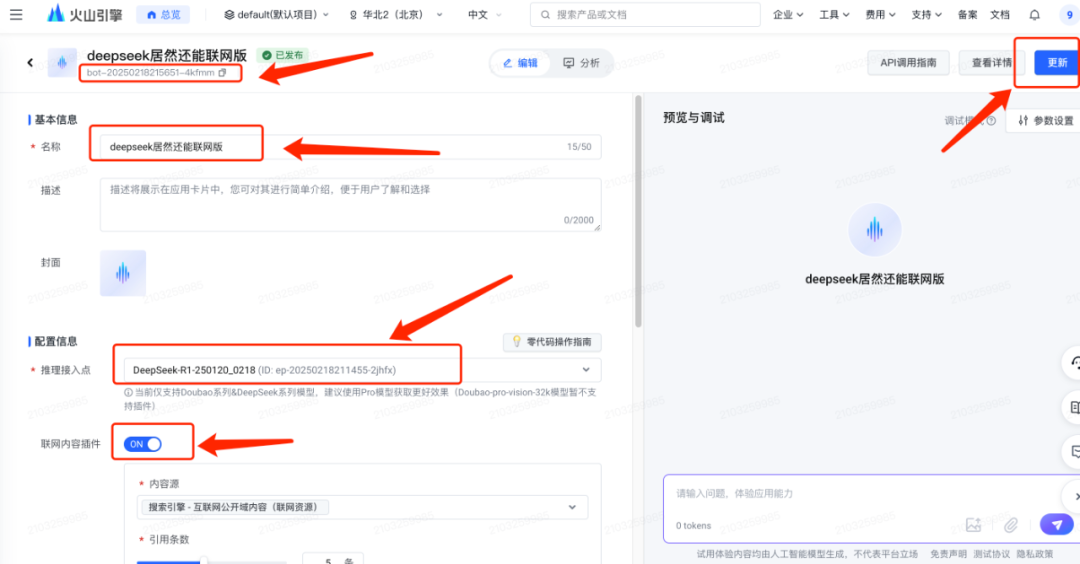
在新的窗口中,先拿到左上角的模型ID。然后,填写名称,选择你创建的推理接入点,打开联网内容插件按钮,用默认配置即可。最后,点击发布(更新)按钮。
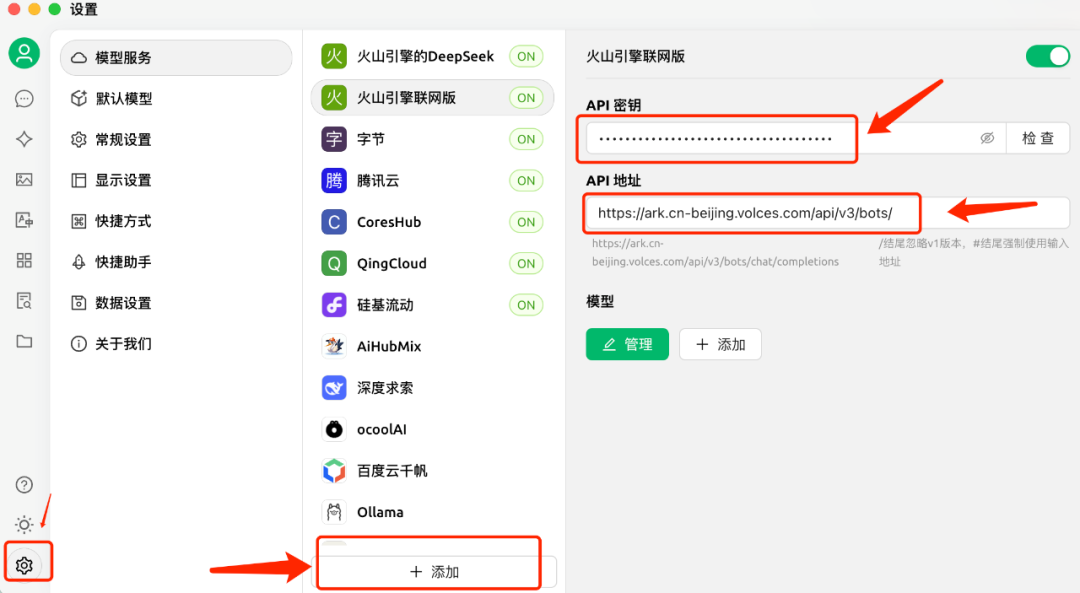
回到Cherry Studio,再次点击模型添加按钮。填写刚才的API密钥,填写新的API地址(直接复制下面的地址即可)。
https://ark.cn-beijing.volces.com/api/v3/bots/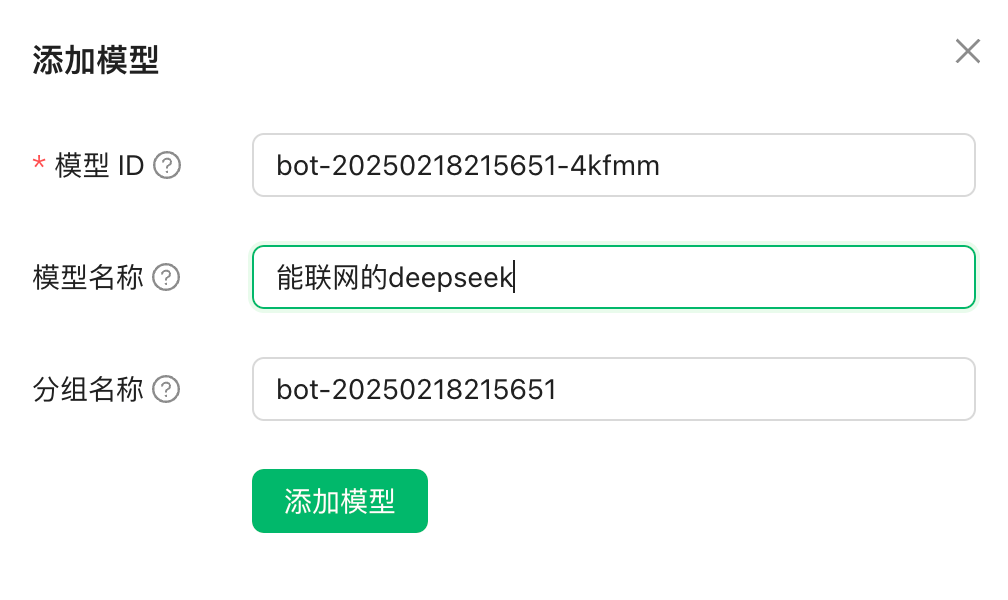
然后,再次点击添加模型的选项,把刚才拿到的模型ID信息填上去。模型名称随便改一下,点击添加模型就万事大吉了。
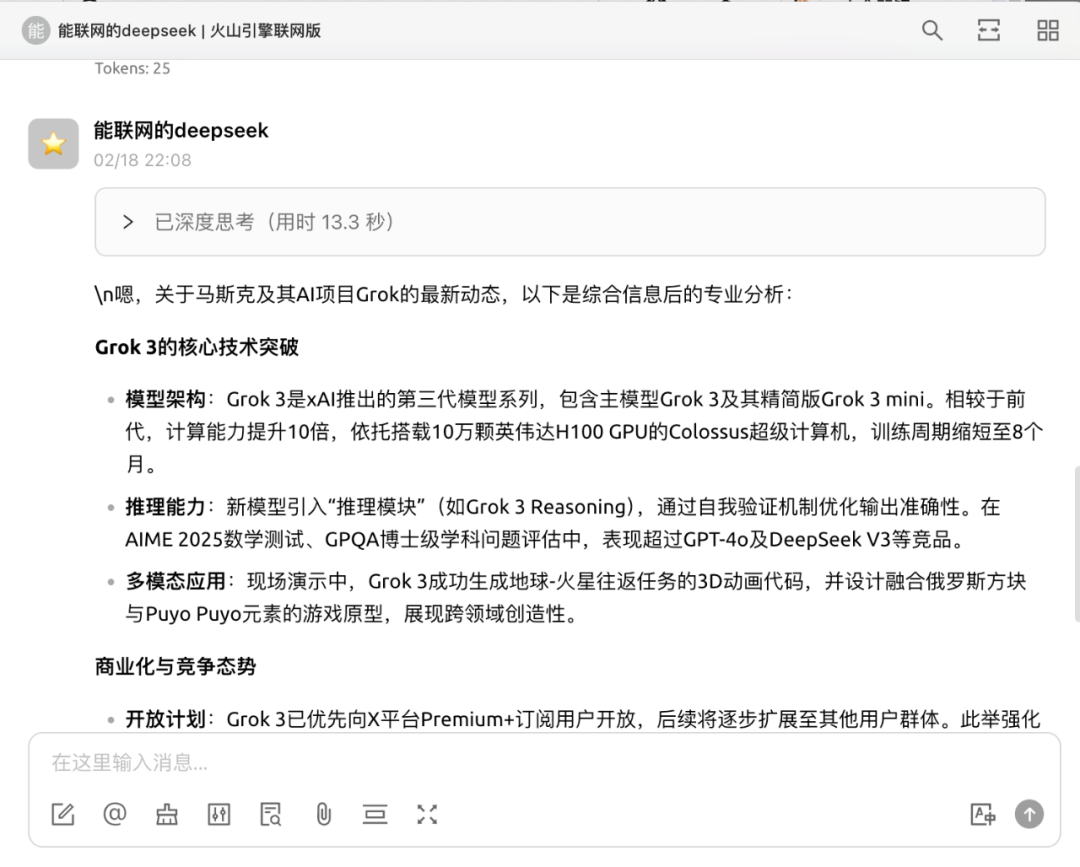
北京时间2月18日,马斯克发布了Grok3模型,拿着个新闻测试一下它,发现它确实可以联网了。
结束
以上就是本次手把手教程的全部内容,如果有什么不清楚的地方,欢迎留言私信,看见后第一时间反馈。希望能跟各位一起学习,拥抱AI时代。